How to Assembly A Small Gantry Crane? | Rail Travelling Type
Content Quick Link
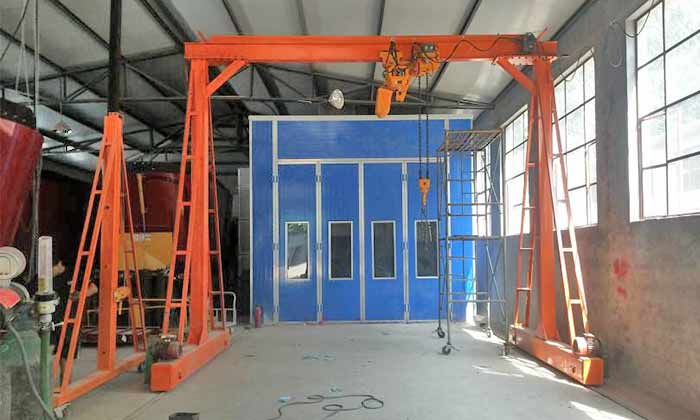
Rail travelling small gantry crane, a portable gantry crane, rail travelling design, simple gantry crane structure, for 500kg to 20 ton material handling. Rail travelling small mobile gantry cranes are commonly used in everyday operation for light duty material handling in various applications such as workshops, warehouse, and open yards for loads hoisting, machinery maintenance, injection molds handling, and various types of loads handling and transportation.

Warning:The operator must read this manual carefully before using the small gantry crane and strictly follow the operation steps in this manual.Illegal operation, will cause serious consequences.
Hoisting is strictly prohibited under any of the following circumstances:
- The weight of the lifted material exceeds the allowable capacity range of the portable gantry crane;
- There's someone under the sling
- Stand above the hanging object
- Lift heavy objects buried in the ground
- Pull the weight diagonally
- The lifting rope is not securely attached to the weight
- Strong winds above level 6
- The rigging is not secure
Small gantry crane installation
There are two main methods of installation, please choose the appropriate installation method according to the actual situation

Main gantry crane structure acan be connected with bolts.
All the main structure of the small gantry crane is conncted by bolts. The small gantry crane drawing is for your reference. The roller gantry and rail travelling gantry crane are designed with similar gantry frame structure except the travelling types .
Assembly method 1

Small gantry crane installation proceture drawing : 1. Install one leg, 2. Connect the main girder with the leg, 3. Supporting the finished frame & installed the other legs. 4, Small gantry finished assembly.
Assembly method 2

Small gantry crane assembly procetures drawing: 1. Assembly the both legs, 2. Connect the gantry girder with the both gantry supporting legs

Small gantry crane finished installation.
Note: The gantry hoist and power supply line installation should be installed after the completion of the gantry structure.
Ground beam of small gantry crane installation

Ground beam of small gantry crane installation

Main parts of gantry crane ground beams includes the motors, driving wheel, driven wheeel, reducer and boring plate, etc.
Please connect the motor to the reducer (We already fixed the reducer to the end carriages. Please also add some oil before seal the reducer).

Gantry crane driving motor installation drawing
Please keep the driving wheels in the same side, just like the two- wheel drive car.
Festoon cable power supply line installation:

Festoon cable parts and components drawing

Small gantry crane festoon cable installation
Please fix the suspension arm onto the top of the crane beam (You can just weld it)
The power line in the towing trolley should be connected to the hoist while the fixed trolley should be connected to the power supply line.
Gantry hoist installation
Electric gantry hoist installation

Electric hoist installation details please refer to the electric chain hoist installation manual

manual gantry hoist installation
Power supply line installation
Attention: The power supply line is measured by the customer and purchased locally.
For indoor use:
You can buy the safe slide wire or the festoon cable to supply power to the crane, the length of the line is determined by the crane site.
Length selection reference:
If you use safe slide wire, two cranes can share one line.

Two gantry cranes share one sliding wire

Details of gantry crane sliding wire

For outdoor ganry use
For the outdoor use gantry crane, we suggest customer buy the same festoon cable as above or the cable drum locally.

Cable drum installation for small gantry crane for outdoor use

If the customer's power pack is at the end of the crane rail, the cable drum length needs to be the whole crane rail length. If the power pack is in the middle of the crane rail, the cable drum length needs to be at least half of the rail length.
Gantry crane rail installation

Gantry crane rail instalaltion: rail clamp & rail press plate

1 ton gantry crane rail is P15.
5 ton gantry crane rail is P22.
The rail press plate should press the rail every 0.6 meter

P15 installation
Attention: The customer should make the steel plate and rebar locally, rebar size length 100mm, diameter is 12mm
- Step1, make the embeded foundation hole, size is 200*200*350 (L/W/D)
- Step2, put the rebar inside the hole and pour the coarse concrete till it reaches 210mm, then put the adjusting nuts and the steel plate, adjusting the nuts till the plate is in the same level of the other plate in the other holes.
- Step3, pour the fine stone in to the hole fill the gap of the first layer of coarse concrete and the steel plate.
- Step3, tighten the fixed nuts and put the rail, then weld the rail press plate to the steel plate in order to press the rail.

Attention: The top of the rail is in the same level of the ground as to avoid the obstructing the road. It is also OK for the rail to be higher than the ground. Please choose your own method.

P22 installation
Attention: The customer should make the steel plate and rebar locally, rebar size length 100mm, diameter is 12mm
- Step1, make the embeded foundation hole, size is 350*350*500 (L/W/D)
- Step2, put the rebar inside the hole and pour the coarse concrete till it reaches 340mm, then put the adjusting nuts and the steel plate, adjusting the nuts till the plate is in the same level of the other plate in the other holes.
- Step3, pour the fine stone in to the hole fill the gap of the first layer of coarse concrete and the steel plate.
- Step3, tighten the fixed nuts and put the rail, then weld the rail press plate to the steel plate in order to press the rail.

Attention: The top of the rail is in the same level of the ground as to avoid the obstructing the road. It is also OK for the rail to be higher than the ground. Please choose your own method.

Article by Bella ,who has been in the hoist and crane field since 2016. Bella provides overhead crane & gantry crane consultation services for clients who need a customized overhead travelling crane solution.Contact her to get free consultation.