4 Ton Pillar Mounted Jib Crane Installation Practical Guide
A step-by-step guide on installing 4-ton pillar-mounted jib crane, ensuring efficiency & safety for workshop operations. Get your 4 ton jib crane!
Category: Featured
Your Trusted Floor Mounted Jib Crane Manufacturer & Supplier
4 Ton Pillar Mounted Jib Crane Installation - A Simple and Practical Guide
Overview of the 4 Ton Pillar Mounted Jib Crane
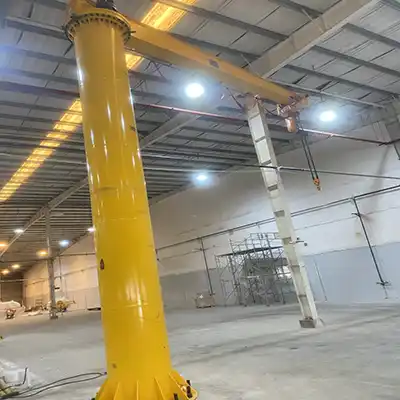
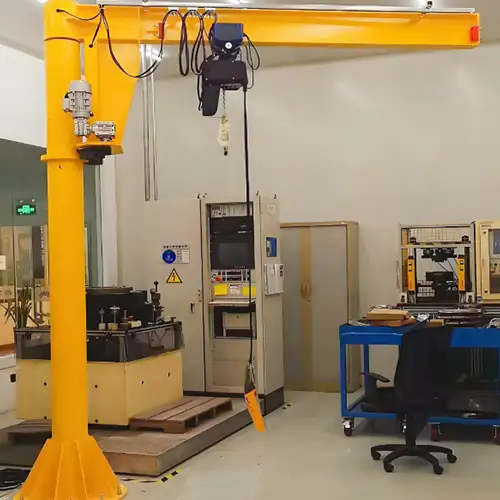
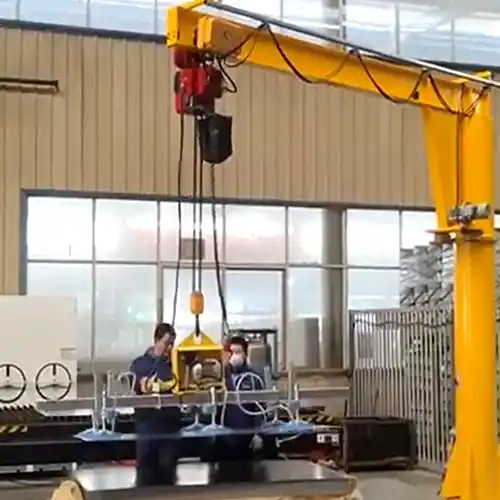
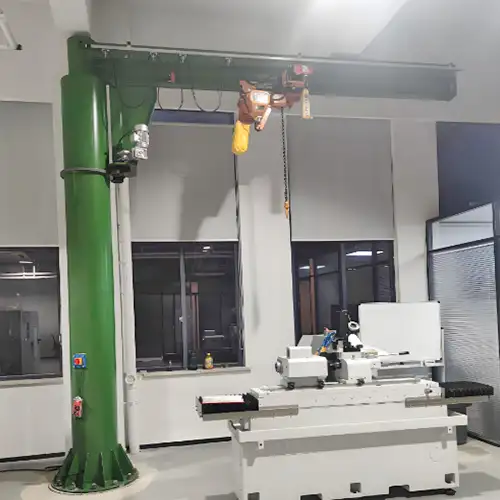
A 4-ton pillar mounted jib crane is designed for moderate lifting capacities in industrial settings like workshops, warehouses, and factories. Its primary function is to lift and move materials within a specific radius, making it ideal for tasks that require precise control in confined spaces. The crane is durable and compact, offering flexibility in operations, especially for light-duty applications.
Importance of Proper Installation
Proper installation is essential for:
- Safety: Ensures the crane operates without risk to operators or the surrounding environment.
- Efficiency: Guarantees smooth, uninterrupted crane movement, boosting productivity.
- Longevity: Reduces wear and tear, extending the crane's operational life. Incorrect installation can lead to accidents, mechanical failures, and costly downtime. A well-installed crane maximizes its full potential.
Scope of the Guide
This guide offers a straightforward, easy-to-follow process for installing a 4-ton pillar mounted jib crane. It covers:
- Site Preparation: Preparing the foundation and location.
- Assembly: Step-by-step instructions on assembling the crane.
- Commissioning: Testing and fine-tuning the crane after installation.
By the end of this guide, you'll have all the information needed to install and commission the crane successfully.

Main parts and components of floor mounted jib cranes

Embeded foundation of the pillar mounted jib crane

Drawing of concrete foundation of the pillar mounted jib crane
Foundation Construction
Understanding Foundation Requirements
The foundation is a critical part of the 4-ton pillar mounted jib crane installation. It supports the crane's pillar and ensures stability during operation. The foundation needs to be embedded deep enough to prevent shifting and handle the crane's weight and movements. A solid, well-constructed foundation distributes the load evenly, minimizing wear and ensuring safety.
Site Preparation
Before starting the installation, assessing and preparing the site is crucial. Ensure the area is:
- Clear of obstructions: Make space for the foundation and crane assembly.
- Level: The foundation must be on solid, level ground to ensure proper alignment.
- Accessible: Ensure that equipment like cranes and excavators can easily reach the installation site.
Tools Needed:
- Excavators for digging the foundation hole.
- Levelers to check the site's horizontal alignment.
- Measuring tapes and markers to outline the foundation's boundaries.

Excavating the Foundation Hole
Proper excavation ensures the foundation is deep and wide enough to handle the crane's load.
The hole should be large enough to accommodate the anchor bolts, leveling board, and bottom board. Typically, the depth should be about 1.5 to 2 meters, depending on soil conditions.
Techniques:
- Dig the foundation hole to the required depth and size.
- Ensure the edges are smooth and the base of the hole is level.
- If necessary, remove any soft soil or debris before proceeding.

Assembling Foundation Components
Once the foundation hole is ready, it's time to assemble the components.
Installing Anchor Bolts:
- Place the anchor bolts at the required positions within the foundation hole, ensuring they are aligned with the crane's mounting points.
- The bolts should be installed securely and with proper spacing for the pillar.

Put the embeded foundation cage into the hole

Leveling

Pouring concerete and embeding wire
Leveling Board and Bottom Board:
- Position the leveling board to ensure the crane base will sit level once installed.
- The bottom board should be placed at the bottom of the foundation hole to provide additional support.
Proper Alignment:
- Double-check the alignment of the anchor bolts, leveling board, and bottom board using a leveler.
- Make any necessary adjustments before moving forward.
Pouring Concrete and Embedding Wiring Tube
The foundation will need to be filled with concrete to secure all components.
Concrete Types and Mixing:
- Use high-strength concrete for durability. A mix with coarse aggregates and a proper water-cement ratio is recommended.
- Prepare the concrete as per the manufacturer's guidelines to ensure consistency.
Embedding Wiring Tube and Wire:
- Before pouring the concrete, place the wiring tube into the foundation to allow for electrical connections.
- Ensure the tube is positioned according to the crane's electrical layout, with the upper entrance centered in the leveling board.
Final Leveling and Securing
Once the concrete has been poured, it's time to finalize the foundation:
Adjusting and Tightening the Leveling Board:
- Ensure the leveling board is perfectly horizontal by adjusting the anchor bolts.
- Tighten the nuts to secure the leveling board in place.
Cementing and Securing:
- Fill any gaps between the components with fine concrete.
- Allow the concrete to cure fully before proceeding with the installation of the crane pillar.
The foundation is now ready to support the crane, ensuring a stable and long-lasting setup.
Floor Mounted Jib Crane Assembly
Preparation for Jib Crane Assembly
Before starting the assembly of the 4-ton pillar mounted jib crane, ensure you have all the required tools and equipment. This preparation is crucial for a smooth installation process.
Necessary Tools and Equipment:
- Cranes/Hoists for lifting heavy parts
- Wrenches and torque tools for securing bolts
- Levelers to check alignment and balance
- Measuring tapes for accurate positioning
- Lifting slings and chains for safe lifting of components
- Safety equipment (gloves, helmets, goggles) for personal protection during assembly
Pre-Assembly Inspection of Foundation Integrity: Before you begin assembling the crane, inspect the foundation:
- Ensure the concrete is fully cured and strong.
- Check the alignment of anchor bolts and leveling board.
- Verify the positioning of the embedded wiring tube.
- Ensure the foundation is stable and level to support the crane.
Pillar or Column Installation
The pillar is a key structural component, and installing it accurately is essential for crane stability.
Attaching the Top Slewing Bearing Flange:
- Secure the slewing bearing flange to the top of the pillar using bolts.
- Ensure the flange is tightly fastened to prevent any looseness.
Positioning the Pillar:
- Using a crane or hoist, carefully lift the pillar into position.
- Align the pillar baseplate with the anchor bolts on the foundation.
Securing the Pillar to the Foundation:
- Once in place, tighten the anchor bolts to secure the pillar firmly.
- Check alignment to ensure the pillar is perfectly vertical using a level.

Cantilever flange and slewing bearing flange

Position the slewing bearing flange into proper postion for the next step.

Installation the slewing bearing flange to the top of the column of the pillar

Run the wire through the column

Lift the column up by a truck crane or forklift

Erect the pillar column upright vertically

Alignment the bolt holes in the baseplate to the bolts in the embeded foundation

Pillar column leveling

Fasten the pillar column baseplate by tightening the nuts onto the bolts embedded in the foundation.
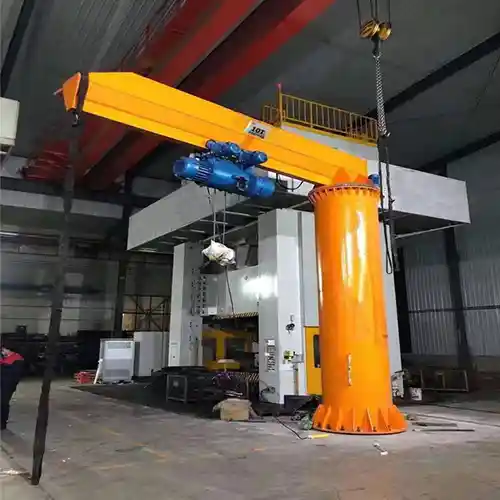
Cantilever Installation
The cantilever arm enables the crane to move loads, so precise installation is essential for smooth operation.
Lifting and Positioning the Cantilever:
- Lift the cantilever arm with a crane or hoist, positioning it carefully above the pillar.
Electric Hoist Installation
The electric hoist is the primary lifting mechanism, so correct installation is crucial.
Mounting the Electric Hoist:
- Lift and mount the electric hoist onto the cantilever arm.
- Ensure the hoist is securely attached using the appropriate bolts or fasteners.
Connecting Power Supply Lines:
- Run the power supply lines through the foundation's wiring tube and into the crane's pillar.
- Connect the power lines to the hoist's electrical system, ensuring all connections are tight and insulated.
- Test the power supply to make sure everything is functioning before proceeding with the commissioning.
Lift the cantilever up to align with the slewing bearing flange at the top of the column.:
- Secure the cantilever arm to the slewing bearing flange using bolts.
- Tighten the bolts to ensure a stable attachment, allowing for free rotation.
With the assembly complete, the floor mounted jib crane is now ready for the final steps of commissioning and testing.

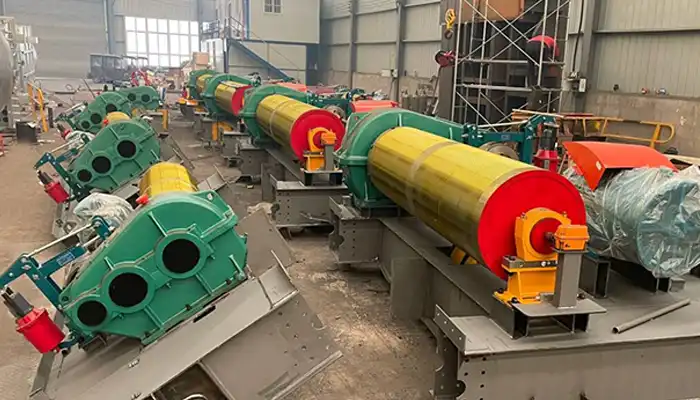
Cantilever of 4 ton pillar jib crane

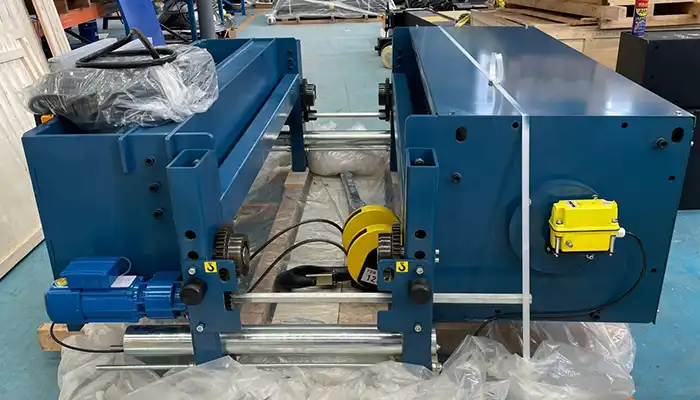
Powering and electric hoist trolley assembly

Electric chain hoist assembly and put the chain falls into the chain bag

Lift the cantilever up and align with the bearing flange at the top of the pillar column

Adjust the cantilever flange with the slewing bearing flange on the top of the pillar column

Fasten the cantilever and adjust the rotation limited devices and commisionning
Commissioning
Pre-Commissioning Checklist
Before fully operating the crane, it is essential to check all components to ensure everything is properly installed and functioning.
- Inspect all crane components, including the pillar, cantilever arm, hoist, and slewing bearing.
- Verify electrical connections to ensure there are no loose or faulty connections.
- Check control systems to make sure all functions respond correctly, and the controls are calibrated.
Testing the Crane Mechanism
Testing the crane mechanisms ensures that it functions smoothly and safely.
- Check hoist functionality by running the hoist through its full range of movement.
- Test slewing movements to ensure the arm rotates smoothly without any obstruction.
- Test the crane's stability under load, ensuring the crane can handle the maximum rated load without issues.
Adjustment and Calibration
Fine-tuning the crane's mechanisms is crucial for optimal performance.
- Fine-tune hoist speed to ensure smooth operation during lifting and lowering of loads.
- Adjust the slewing mechanism for efficient rotation and precise movements.
- Check load balancing, ensuring that the crane operates evenly and safely when lifting.
Safety Inspections
Ensure that all safety features are in place and fully functional before starting regular operations.
- Verify safety features, including emergency stop buttons, limit switches, and safety brakes.
- Ensure compliance with regulations related to crane operation, including load limits, working heights, and electrical safety standards.
Operational Training
Proper training is essential for crane operators to use the machine safely and effectively.
- Provide basic crane operation training, covering control usage and load handling.
- Educate operators on safety protocols, including emergency procedures and safe lifting practices.
- Offer maintenance tips to ensure the crane remains in optimal working condition and to prevent breakdowns.
With all steps completed, the crane is ready for full operation.
Conclusion
The installation of the 4-ton pillar mounted jib crane involves several key steps:
- Foundation construction: Preparing and setting up the embedded foundation with anchor bolts, leveling board, and concrete.
- Crane assembly: Installing the pillar, cantilever, and electric hoist with precise alignment and secure connections.
- Commissioning: Verifying the crane's functionality, testing mechanisms, and ensuring safety features are in place before full operation.
Proper and regular maintenance is crucial for ensuring the crane's long-term performance. Routine checks, lubrication, and timely repairs help prevent operational issues and extend the crane's lifespan. Always refer to the manufacturer's maintenance guidelines for best practices.
Final Recommendations
- Safe Operation: Always follow safety protocols, use the crane within its rated capacity, and ensure all operators are properly trained.
- Troubleshooting: If any issues arise, conduct thorough checks of the electrical system, hoist, and mechanical components. Keep spare parts on hand for quick replacements.
Note: This guide is for reference only. For your specific installation, please consult your crane supplier for personalized guidance and support.


Related Products
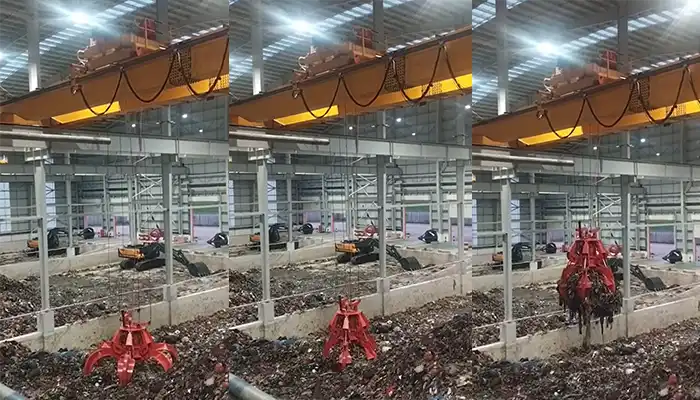
Supplied three grab bucket crane kits to Indonesia, enhancing garbage handling efficiency with high load capacity and reliable performance.
Free consultation to Confirm Parameters & Specifications and Get
Latest Crane Price & Crane Rate.
- Types of overhead cranes : _______?
- Optional: Overhead travelling crane, goliath gantry crane,Slewing jib crane, Single girder or double girder crane,small portable crane or kbk crane, etc.
- Capacity of overhead crane: _______?
- Optional: 0.25ton, 0.5 ton, 1 ton, 2 ton, 3ton, 5 ton, 10 ton,15ton, 20ton, 25 ton, 30ton,35ton, up to 550ton, etc.
- Crane span & lifting height : _______?
- Crane travelling length : _____?
- Control of overhead crane:_______?
- Optional: pendant/ remote/cabin control
- Voltage supply of overhead crane:_____?
- Eg,: 380V50/60HZ,3Phase or others,etc.
- Application/usage of crane:_______?
- Eg,: Steel mill, ,injection mold, cement,stone, concrete,granite, general manufacturing, etc.
Just leave a message via the contact form and our hoist and crane engineer will contact you with in 24working hours.
Get In Touch