Straddle Carrier Manufacturer's Cable Table & Maintenance Tips
Straddle Carrier Crane Manufacturer’s Cable Table & Key Maintenance Tips to Extend Lifespan, Ensure Industrial Sraddle Crane Efficiency& Minimize Downtime.
| Application | Material handling, lifting, positioning, assembly, maintenance, loading/unloading, |
| Certifications | CE / ISO / SGS / Other third-party inspection |
| Customization | Customized material handling cranes solutions available for indoor, outdoor, hazardous, corrosive, cleanroom, and heavy-duty industrial applications. |
Category: Featured
Tags: straddlecrane
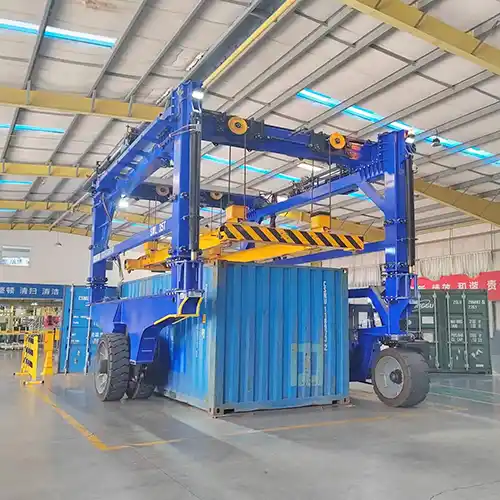
Your Trusted Straddle Carrier Crane Manufacturer & Supplier
Straddle Carrier Manufacturer's Cable Table & Maintenance Tips
Straddle Carrier Crane Manufacturer's Cable Table & Key Maintenance Tips to Extend Lifespan, Ensure Efficiency& Minimize Downtime.Industrial Sraddle Crane for Sale
Essential Maintenance Tips for Straddle Carriers & Care Table
Overview of Straddle Carrier Maintenance
Straddle carriers are a crucial part of many heavy-duty operations. Keeping them well-maintained is key to ensuring they run smoothly. Regular maintenance is vital to avoid unexpected issues. Proactive care can help prevent costly repairs and minimize downtime. If you want your equipment to keep up with demand, maintaining it properly is a must.
Why Maintenance Matters
- Prolongs the Life of the Carrier:
Regular upkeep ensures that straddle carriers stay in top condition, lasting longer and avoiding premature replacements. - Ensures Safety and Efficiency in Operations:
Well-maintained equipment operates safely, reducing the risk of accidents. It also helps workers feel more confident in their tasks, improving overall productivity. - Reduces Unexpected Breakdowns and Maintenance Costs:
A solid maintenance routine reduces the chances of sudden malfunctions, saving you on expensive emergency repairs and reducing unscheduled downtimes.
Key Components of a Straddle Carrier
Frame and Chassis
- Importance of Structural Integrity:
The frame and chassis form the backbone of the straddle carrier. Ensuring they are in good condition is critical to supporting heavy loads and maintaining overall stability. Any cracks or deformations could compromise the safety of the entire system. - Common Wear Points to Monitor:
Look out for stress points, especially around welds, joints, and load-bearing areas. Regular inspections can help identify early signs of wear that might lead to more significant issues down the line.
Wheels and Tires
- Regular Tire Inspection and Inflation Checks:
The wheels are responsible for carrying the entire load, so ensuring they are properly inflated and in good condition is essential. Check for air pressure regularly to avoid uneven weight distribution or tire blowouts. - Monitoring for Signs of Uneven Wear:
Uneven tire wear could indicate alignment problems or excessive load on one side. This can affect both performance and safety, so it's important to correct any issues early to prevent further damage.
Hydraulic Systems
- Importance of Fluid Levels and Leak Prevention:
The hydraulic system powers many of the lift and drive functions in a straddle carrier. Keeping fluid levels consistent and inspecting for leaks is essential for smooth operation. Lack of hydraulic fluid can lead to system failure. - Checking and Replacing Hydraulic Fluid:
Hydraulic fluid should be replaced at regular intervals. Always ensure that it is clean and free of contaminants, which can lead to wear and damage in the hydraulic pumps and cylinders.
Electrical and Control Systems
- Inspecting Sensors, Load Monitoring Systems, and Control Panels:
Modern straddle carriers are equipped with advanced sensors and load monitoring systems. These need to be checked regularly to ensure that they are providing accurate readings, which are crucial for safe operation. - Ensuring Proper Functioning of Electrical Components and Wiring:
Check all wiring for wear or corrosion. Faulty wiring or malfunctioning electrical components can lead to control failures, which could result in operational hazards.
Braking and Safety Systems
- Importance of Regular Brake Checks:
Regular brake inspections are crucial for ensuring the carrier can stop quickly and safely under heavy loads. Check for brake wear, fluid levels, and the functionality of braking mechanisms. - Ensuring Stability and Security Mechanisms Are in Place:
Make sure all safety systems, including stability control and overload protection, are functioning correctly. These systems help prevent tipping or unsafe operation when carrying heavy or uneven loads.
Preventive Maintenance Schedule
Daily Inspections
- Quick Visual and Operational Checks Before Use:
Start the day with a quick inspection. Look for obvious signs of wear, damage, or fluid leaks. This ensures that everything is in working order before use. Check that all lights and alarms are functional to guarantee safety. - Ensuring No Obvious Leaks, Cracks, or Wear in Essential Components:
Pay attention to crucial parts like the hydraulic system, tires, and frame. A small crack or leak might not seem like a big issue, but it can quickly escalate if not addressed.
Weekly Checks
- Lubrication of Moving Parts:
Every week, lubricate key moving parts like hinges, joints, and wheels. Proper lubrication helps reduce friction, prevent excessive wear, and extend the life of the carrier. - Checking Tire Pressure and Hydraulic Fluid Levels:
Tire pressure should be checked weekly to ensure optimal performance. Also, verify that hydraulic fluid levels are within the recommended range, topping up if needed. This is critical for smooth operation, especially under heavy loads.
Monthly Maintenance
- More Detailed Checks on the Frame and Chassis for Any Damage or Wear:
Inspect the structural components for any signs of cracking, rust, or other forms of damage. The frame and chassis carry the full load, so keeping them in top condition is essential. - Ensuring All Safety Features (Brakes, Sensors, etc.) Are Functioning:
Make sure all safety features, including brakes, sensors, and stability controls, are in proper working order. Safety systems need to be checked monthly to ensure they're ready to perform in case of an emergency.
Quarterly and Annual Inspections
- Thorough Examination of Structural Integrity, Wiring, and Hydraulic Systems:
Every few months, conduct a more in-depth inspection of the straddle carrier. This includes checking the structural integrity of the chassis, reviewing the wiring for any wear or corrosion, and inspecting hydraulic components for any leaks or damage. - Cleaning of Electrical Components to Prevent Dust Build-Up:
Dust and dirt can damage electrical systems. Ensure that all sensors, wiring, and control panels are cleaned to prevent any interference in their functioning. - Detailed Review of Load-Bearing Components for Any Signs of Wear:
Perform a comprehensive check on the load-bearing components like the lifting arms and hooks. Any wear in these areas could affect lifting capacity and overall safety.
Common Issues and Troubleshooting
Hydraulic Leaks
How to Identify and Repair Common Hydraulic Fluid Leaks:
Hydraulic leaks are a common issue in straddle carriers. Look for visible oil spots on the ground or a drop in hydraulic fluid levels. If you notice reduced lifting power or slower operation, it's likely due to a leak.
Repair Steps:
- Identify the source of the leak by inspecting hoses, fittings, and seals.
- Tighten or replace damaged components.
- Refill the hydraulic fluid to the correct level after repairs.
Uneven Tire Wear
Causes of Uneven Tire Wear and How to Address Them:
Uneven tire wear can result from improper tire pressure, misalignment, or overloading the carrier. If one side of the tire is more worn than the other, it may indicate an issue with the carrier's weight distribution or alignment.
Fixes:
- Regularly check tire pressure to ensure it's within the recommended range.
- Ensure proper wheel alignment and balance.
- Avoid overloading the carrier beyond its weight capacity to prevent excess strain on the tires.
Importance of Balancing and Proper Tire Alignment:
Proper tire alignment and balance ensure even wear and maintain the carrier's stability. This reduces the risk of accidents and extends the life of the tires.
Electrical System Failures
Common Electrical Problems, Such as Faulty Wiring or Sensor Failures:
Electrical failures can lead to serious operational issues. Common problems include faulty wiring, dead batteries, or malfunctioning sensors. Check for issues like flickering lights, failure of load monitoring systems, or sudden power losses.
Troubleshooting Steps:
- Inspect all electrical components and wiring for visible damage, corrosion, or wear.
- Test the electrical circuits and sensors for continuity.
- Replace any defective wiring or sensors as needed.
- If problems persist, consult an expert or electrician for a more detailed diagnosis.
Brake and Control Issues
Identifying When Brakes Are Not Functioning Properly:
Issues with the braking system can be critical for safety. If you notice longer stopping distances, a spongy brake feel, or failure to hold the load in place, it could indicate problems with the brakes.
Fixes:
- Check brake pads and fluid levels regularly.
- Inspect for signs of wear or damage in the braking system.
- If the brakes are not engaging correctly, consider replacing the brake pads or repairing any leaks in the brake lines.
Steps to Take if Load Handling or Lifting Precision is Off:
Inaccurate lifting or load handling can be due to issues with the control systems or the hydraulic system. If you experience jerky movements or difficulty lifting, it could indicate a problem with the hydraulic fluid, valve malfunctions, or sensor failures.
Troubleshooting:
- Check hydraulic fluid levels and condition.
- Ensure the control system is calibrated correctly.
- Inspect lifting arms and load sensors for damage or malfunctions.
- Call for professional help if the issue isn't easily resolved.


Best Practices for Extending the Life of Your Straddle Carrier
Operator Training
- Proper Training Reduces Wear and Tear
A well-trained operator can significantly reduce wear and tear on the straddle carrier. By learning to operate the carrier smoothly and avoiding abrupt movements, operators help minimize strain on key components like tires, hydraulics, and the braking system. - Smooth and Controlled Movements
Encouraging operators to adopt gentle starts, stops, and turns can drastically extend the life of the carrier. Training on load management, weight distribution, and proper steering techniques ensures optimal performance and reduces unnecessary stress on the machinery.
Environmental Considerations
Impact of Environmental Factors
Environmental factors such as temperature, humidity, and dust play a crucial role in maintenance needs. For example:
- High temperatures may cause overheating of hydraulic systems.
- High humidity can lead to rust and corrosion of metal parts.
- Dust can clog filters and damage electrical components.
Adjusting Maintenance Schedules
Depending on environmental conditions, maintenance schedules should be adjusted. For example, in dusty environments, more frequent filter cleaning may be needed. Similarly, if the operating area has extreme temperatures, hydraulic fluid levels and cooling systems should be checked more often to ensure proper function.
Keeping Records
- Importance of Maintenance Logs: Keeping detailed records of all maintenance activities is essential for tracking the health of the straddle carrier. A maintenance log helps identify patterns, such as recurring issues or parts that need frequent attention.
- Tracking Past Maintenance: Documenting past maintenance work allows operators and managers to anticipate future problems. By reviewing logs, they can spot potential issues before they escalate, making it easier to schedule proactive repairs and avoid unexpected downtime.
Cost Considerations and Benefits
Cost of Regular Maintenance vs. Repair Costs
- Preventing Major Repairs
Regular maintenance plays a key role in reducing long-term costs. By addressing minor issues before they turn into major breakdowns, you avoid expensive repairs or the need to replace costly components. For example, replacing worn-out parts or fluid before it leads to system failure can save thousands of dollars in repair costs. - Financial Benefits of Proactive Care
The financial benefits of regular maintenance far outweigh the costs. By maintaining the straddle carrier in top condition, you can avoid unnecessary emergency repairs and unplanned replacements, which often come with high costs. A small investment in preventive care can yield significant savings over time.
Downtime and Productivity
- Maintaining Plant Uptime
Every minute of unplanned downtime can have a negative impact on plant productivity. Regular maintenance helps ensure the straddle carrier operates efficiently, reducing the likelihood of unexpected breakdowns that could halt operations. - Preventive Care for Smooth Operations
Preventive maintenance plays a direct role in keeping the operations running smoothly. With fewer interruptions, the plant can maintain a consistent pace, meet production goals, and avoid costly delays. By proactively checking and maintaining critical components, you reduce the risk of downtime and enhance overall productivity.
Straddle Carrier Crane Maintenance and Care Table
| Inspection Item | Inspection Content | Inspection Method | Daily (8h) | Monthly (200h) | 6 Months (1200h) | 12 Months (2400h) | Every 2 Years (4800h) | Remarks |
|---|---|---|---|---|---|---|---|---|
| Engine | Engine running condition | Visual | ○ | ○ | ○ | ○ | ○ | |
| Engine sound | Ears | ○ | ○ | ○ | ○ | ○ | ||
| Exhaust color | Visual | ○ | ○ | ○ | ○ | ○ | ||
| Clean or replace air filter element | Visual | ○ | ○ | ● | ● | |||
| Check crankcase for dirt | Operation | ○ | ○ | ○ | ||||
| Check and adjust valve clearance | Feeler gauge | ○ | ○ | ○ | ||||
| Tighten cylinder head compression bolts | Torque wrench | ○ | ||||||
| Check cylinder compression pressure | Pressure gauge | ○ | ||||||
| Crankcase Ventilation | Check valve box and pipe for blockages or damage | Visual | ○ | ○ | ||||
| Starter Motor | Check small gear engagement | ○ | ○ | ○ | ||||
| Governor/Spray Pump | Check no-load maximum speed | Tachometer | ○ | |||||
| Lubrication System | Oil leakage | Visual | ○ | ○ | ○ | ○ | ○ | |
| Check oil level and cleanliness | Visual | ○ | ○ | ○ | ○ | ○ | ||
| Change engine oil | Operation | ● Initial 50h | ● | ● | ||||
| Change engine oil filter | Operation | ● Initial 200h | ● | ● | ||||
| Fuel System | Check for oil leaks in pipes, pumps, and tanks | Visual | ○ | ○ | ○ | ○ | ○ | |
| Check fuel filter for blockage | Visual | ○ | ○ | ○ | ||||
| Change fuel filter | Operation | ● | ● | ● | ||||
| Inspect nozzles, adjust pressure and condition | Injector tester | ○ | ○ | |||||
| Check injection timing | Operation | ○ | ||||||
| Clean fuel tank | Visual | ○ | ○ | ○ | ||||
| Check fuel quantity | Visual | ○ | ○ | ○ | ○ | ○ | ||
| Cooling System | Check coolant level | Visual | ○ | ○ | ○ | ○ | ○ | |
| Check for leaks | Visual | ○ | ○ | ○ | ○ | ○ | ||
| Check hose aging | Visual | ○ | ○ | ○ | ○ | ○ | ||
| Check radiator cap for function and installation | Visual | ○ | ○ | ○ | ○ | |||
| Clean or replace coolant | Operation | ● | ● | |||||
| Check fan belt tension and damage | Visual | ○ | ○ | ○ | ○ | ○ | ||
| Walking Device | Check tires for cracks or damage | Visual | ○ | ○ | ○ | ○ | ○ | |
| Check wear on contact surface | Depth gauge | ○ | ○ | ○ | ○ | |||
| Check for abnormal wear | Visual | ○ | ○ | ○ | ○ | ● | ||
| Check for nails, stones, or debris on tires | Visual | ○ | ○ | ○ | ○ | |||
| Grease bearings | Operation | ● | ● | |||||
| Hydraulic System | Check steering cylinder operation | Visual | ○ | ○ | ○ | ○ | ○ | |
| Check for leaks | Visual | ○ | ○ | ○ | ○ | ○ | ||
| Check for looseness at installation and joints | Visual | ○ | ○ | ○ | ○ | |||
| Check for hose damage, leaks, or cracks | Visual | ○ | ○ | ○ | ○ | |||
| Lifting Cylinder | Check piston rod, threads, and connections for looseness, deformation, or damage | Hammer | ○ | ○ | ○ | ○ | ○ | |
| Check operation | Visual | ○ | ○ | ○ | ○ | ○ | ||
| Check for leakage | Visual | ○ | ○ | ○ | ○ | ○ | ||
| Hydraulic Pump | Check for oil leakage or noise | Operation | ○ | ○ | ○ | ○ | ○ | |
| Check wear on pump gear | Operation | ○ | ○ | ○ | ○ | ○ | ||
| Hydraulic Tank | Check tank and change oil | Operation | ○ | ○ | ○ | ○ | ○ | |
| Clean suction filter | Operation | ○ | ○ | |||||
| Remove foreign objects | Operation | ○ | ○ | |||||
| Return Oil Filter | Change return oil filter | Operation | ● | |||||
| Control Valve | Check for loose connections | Operation | ○ | ○ | ○ | ○ | ○ | |
| Check operation | Operation | ○ | ○ | ○ | ○ | ○ | ||
| Multiple Valve | Check for oil leakage | Visual | ○ | ○ | ○ | ○ | ○ | |
| Check safety valve | Visual | ○ | ○ | ○ | ○ | |||
| Measure safety valve pressure | Oil pressure gauge | ○ | ○ | ○ | ○ | |||
| Piping Joints | Check for leakage, looseness, cracks, deformation, or damage | Visual | ○ | ○ | ○ | ○ | ||
| Change high-pressure hose | Operation | ○ | ○ | ● | ||||
| Electrical System | Check battery electrolyte level and cleanliness | Visual | ○ | ○ | ○ | ○ | ||
| Check battery electrolyte density | Hydrometer | ○ | ○ | ○ | ||||
| Check wiring harness for damage or loose fittings | Operation | ○ | ○ | ○ | ○ | |||
| Check for loose electrical connections | Operation | ○ | ○ | ○ | ||||
| Major Components | Check frame and beams for damage or cracks | Visual | ○ | |||||
| Check rivets and bolts for looseness | Hammer | ○ | ||||||
| Check previously repaired areas if necessary | Operation | ○ | ○ | ○ | ○ | ○ | ||
| Comprehensive inspection | Operation | ○ | ||||||
| Wire Rope | Replace wire rope | Operation | ● | |||||
| Lubricate wire rope | Operation | ○ | ● | ● | ● | |||
| Check for broken strands in individual wires | Visual | ○ | ○ | ○ | ○ | ○ | ||
| Lifting Devices | Replace pin | Operation | ○ | ○ | ○ | ● | 1-2 years | |
| Replace pin nut | Operation | ○ | ○ | ○ | ● | 1-2 years |
Conclusion
Summary of Key Maintenance Tips
A well-planned maintenance schedule is crucial for keeping straddle carriers in optimal condition. Regular inspections, timely lubrication, and proactive care of critical components such as tires, hydraulics, and electrical systems help prevent major breakdowns and costly repairs. Additionally, operator training and environmental considerations play significant roles in extending the life of your carrier.
Final Thoughts on Carrier Longevity
Regular maintenance is an investment that pays off in the long run. Not only does it minimize repair costs and unexpected downtime, but it also ensures maximum productivity and efficiency for your operations. By prioritizing maintenance, you extend the lifespan of the straddle carrier, making it a cost-effective asset that serves your manufacturing plant well for years to come.


Free consultation to Confirm Parameters & Specifications and Get
Latest Crane Price & Crane Rate.
- Types of overhead cranes : _______?
- Optional: Overhead travelling crane, goliath gantry crane,Slewing jib crane, Single girder or double girder crane,small portable crane or kbk crane, etc.
- Capacity of overhead crane: _______?
- Optional: 0.25ton, 0.5 ton, 1 ton, 2 ton, 3ton, 5 ton, 10 ton,15ton, 20ton, 25 ton, 30ton,35ton, up to 550ton, etc.
- Crane span & lifting height : _______?
- Crane travelling length : _____?
- Control of overhead crane:_______?
- Optional: pendant/ remote/cabin control
- Voltage supply of overhead crane:_____?
- Eg,: 380V50/60HZ,3Phase or others,etc.
- Application/usage of crane:_______?
- Eg,: Steel mill, ,injection mold, cement,stone, concrete,granite, general manufacturing, etc.
Just leave a message via the contact form and our hoist and crane engineer will contact you with in 24working hours.
Get In Touch